Widen Your Horizons: Mastering Panoramic Photography
Capturing the expansive beauty of a landscape or cityscape can be challenging with a single shot, especially if you want to convey the vastness of the scene. This is where panoramic photography comes in. By stitching together multiple images, you can create stunning wide-angle shots that showcase the grandeur of your subject. In this article, we'll explore how to shoot and edit panoramic photos to achieve professional results, including the different stitching methods in Lightroom: spherical, cylindrical, and perspective. One of the advantages of stitching multiple images together is the ability to create a final image with much higher resolution than a single shot. This allows for large prints and detailed crops without losing quality.
Understanding Panoramic Photography
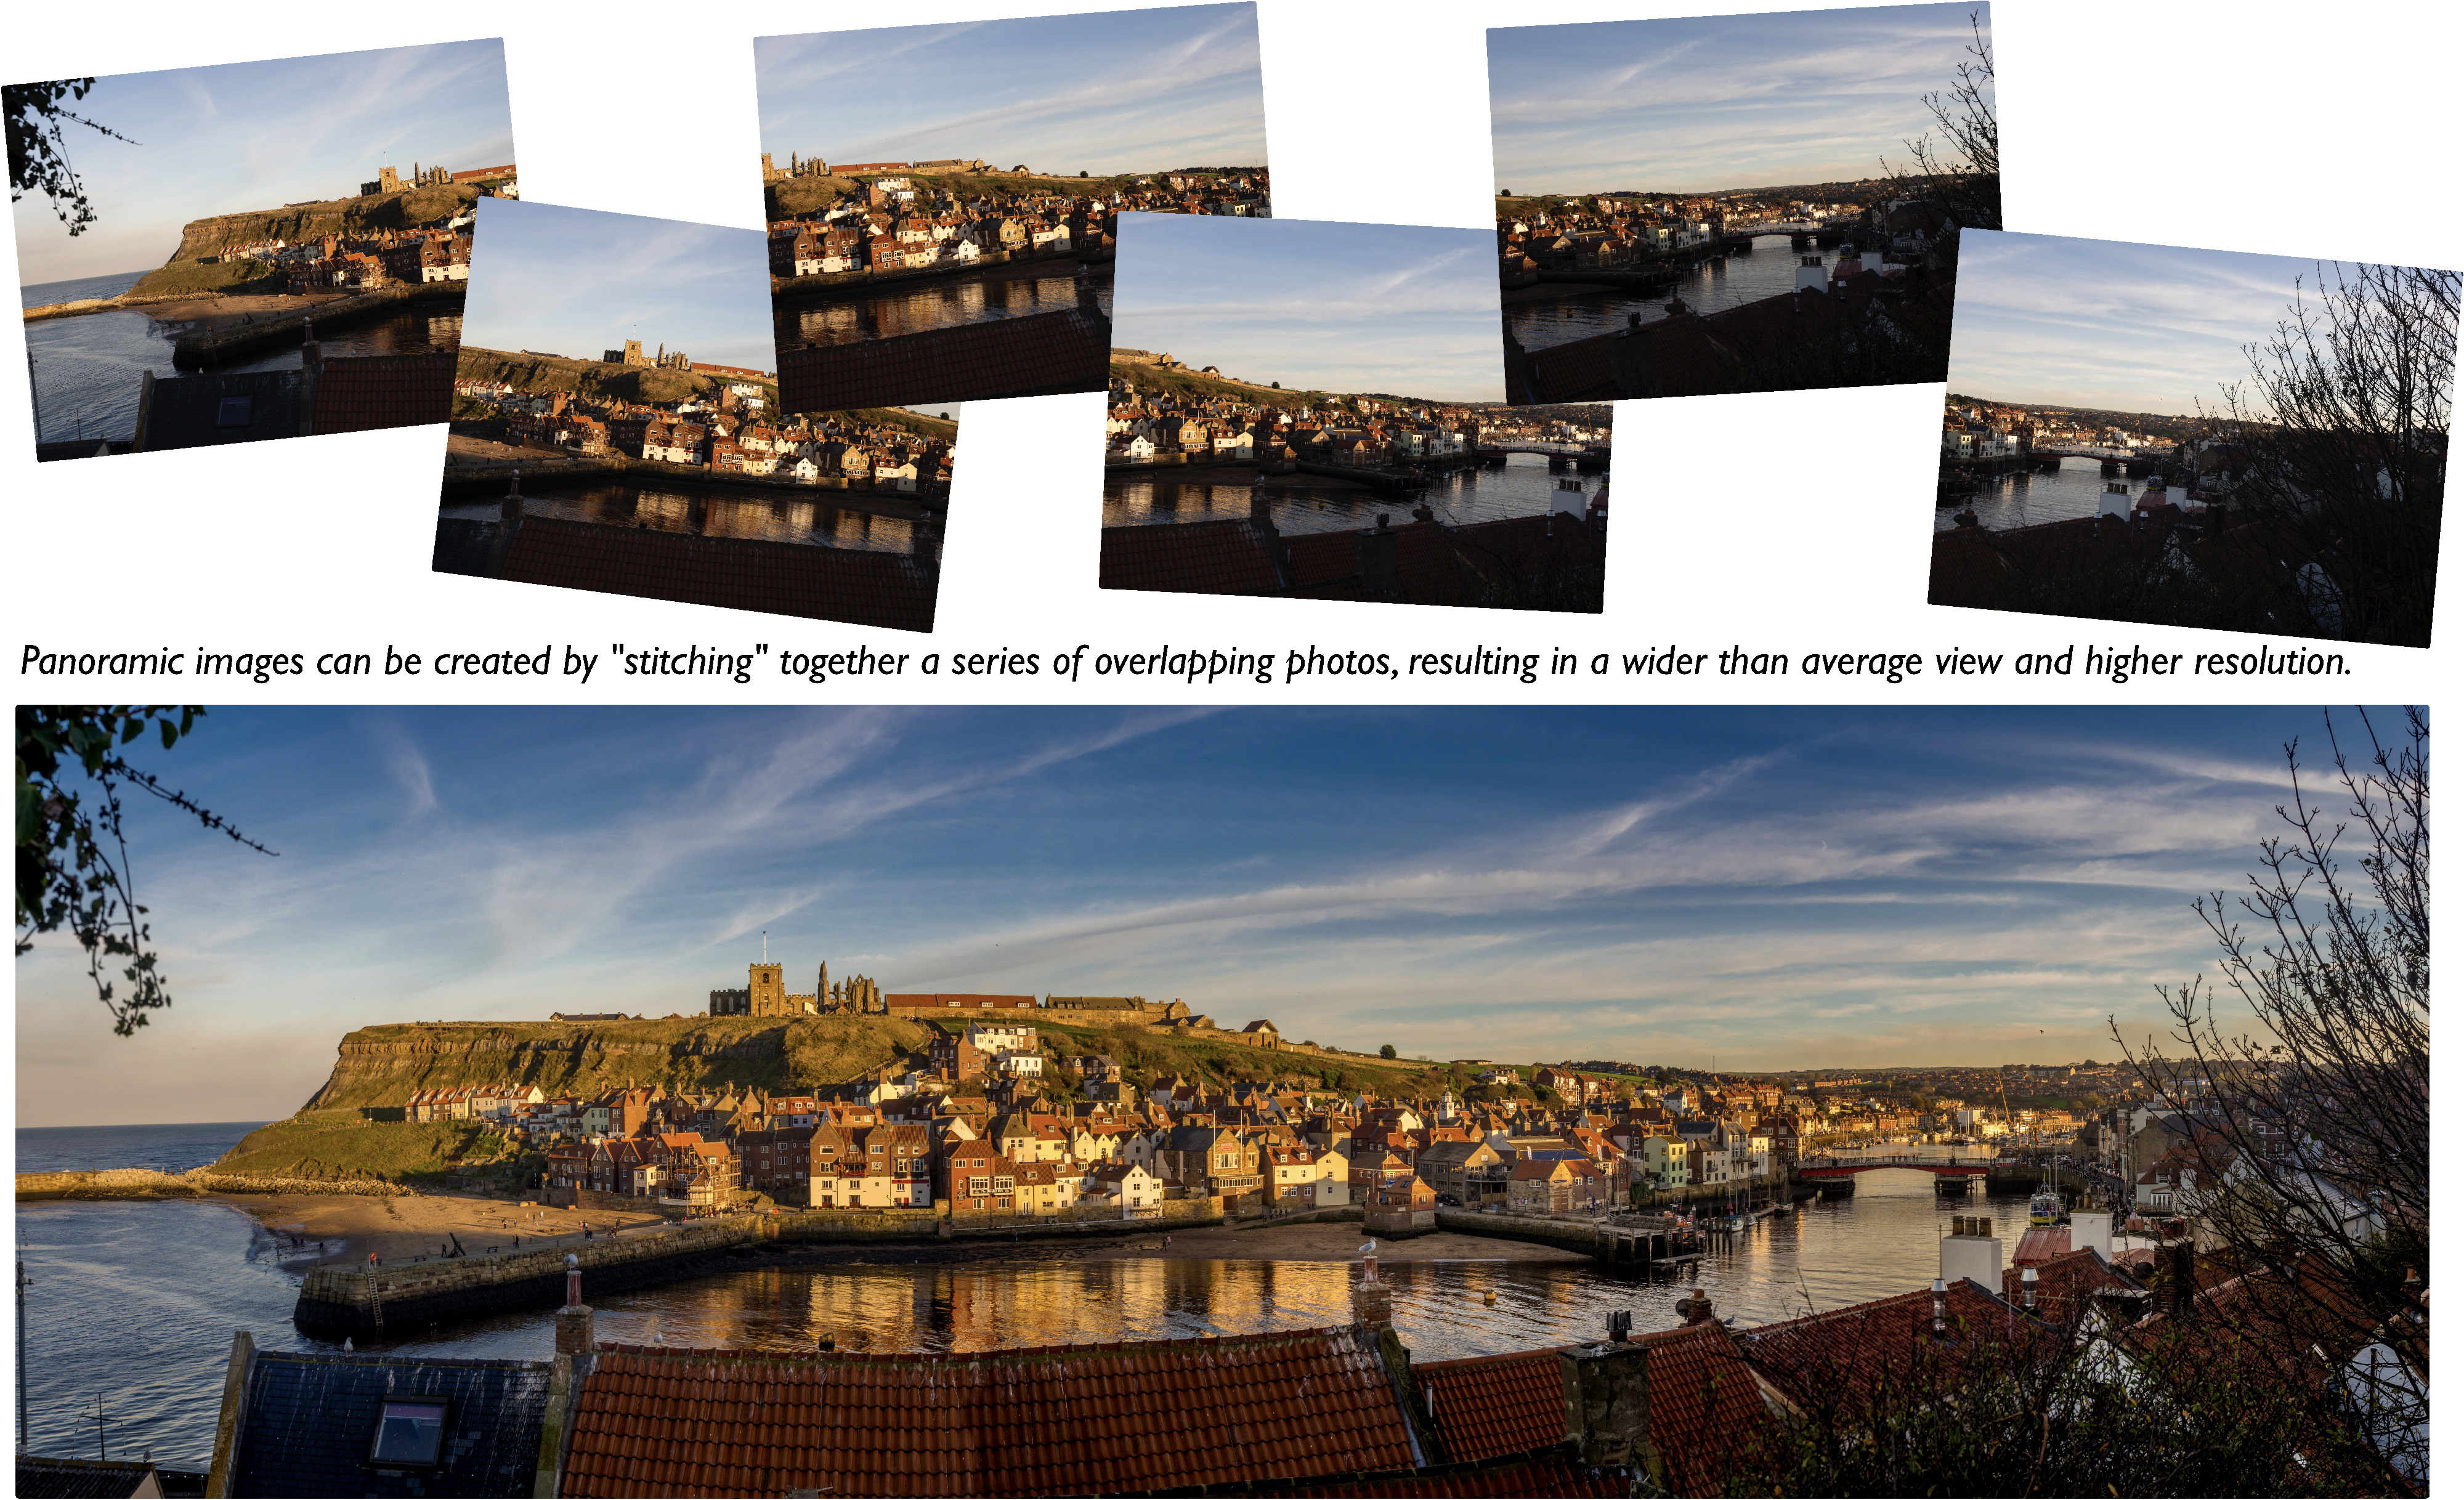
Panoramic photography involves capturing a series of images with overlapping fields of view and then stitching them together to create a single, continuous image. This technique is perfect for landscapes, cityscapes, and any scene where you want to include a wide field of view.
Preparing for Your Panoramic Shot
1. Choosing the Right Equipment
Camera and Lens: While you can create panoramas with any camera, using a DSLR or mirrorless camera with a wide-angle lens can provide better results. A focal length of 24mm or wider is ideal.
Tripod: To ensure consistent alignment and avoid camera shake, use a sturdy tripod. A panoramic head can further help in maintaining the level and consistent panning.
Levelling Tools: Use a bubble level or the electronic level in your camera to keep your shots aligned.
2. Camera Settings
Manual Mode: Set your camera to manual mode to maintain consistent exposure across all shots. Adjust ISO, aperture, and shutter speed manually.
Focus: Use manual focus to prevent the camera from refocusing between shots. Focus on a point about one-third into the scene for maximum depth of field.
White Balance: Set a fixed white balance to ensure consistent colour across all images.
Shooting the Panorama
1. Plan Your Shots
Overlap: Ensure each shot overlaps the previous one by about 20–30%. This overlap is crucial for the stitching software to blend the images seamlessly. It's always best to have too many shots at this stage as you can decide which ones to use when you get to the "stitching" stage in post-production.
Vertical or Horizontal: Decide whether to shoot in landscape or portrait orientation. Portrait orientation can provide more vertical detail and is often preferred for landscapes.
2. Capture the Sequence
Start from One End: Begin at one end of the scene and take a series of shots, panning across the scene from left to right or vice versa. If possible, use a remote shutter release to avoid camera shake.
Handholding: If you're not using a tripod, pick a point such as the horizon and keep this in a consistent vertical position within the frame for each shot. It makes the stitching process less prone to errors later on.
Keep it level: Keeping your camera level rather than pointing up or down will usually produce the best results when it comes to stitching.
Shooting Panoramas on iPhone and Android Phones
Modern smartphones come equipped with built-in panorama modes that make it easy to capture wide-angle shots without the need for additional software.
- Open the Camera app and swipe to "Pano" mode.
- Hold your phone in portrait orientation and tap the shutter button.
- Slowly pan your phone horizontally, keeping the arrow on the screen aligned with the guide.
- Tap the shutter button again to finish.
- Open the Camera app and select "Panorama" mode.
- Hold your phone steady and tap the shutter button.
- Slowly move your phone in the direction indicated on the screen.
- Tap the shutter button again to complete the panorama.
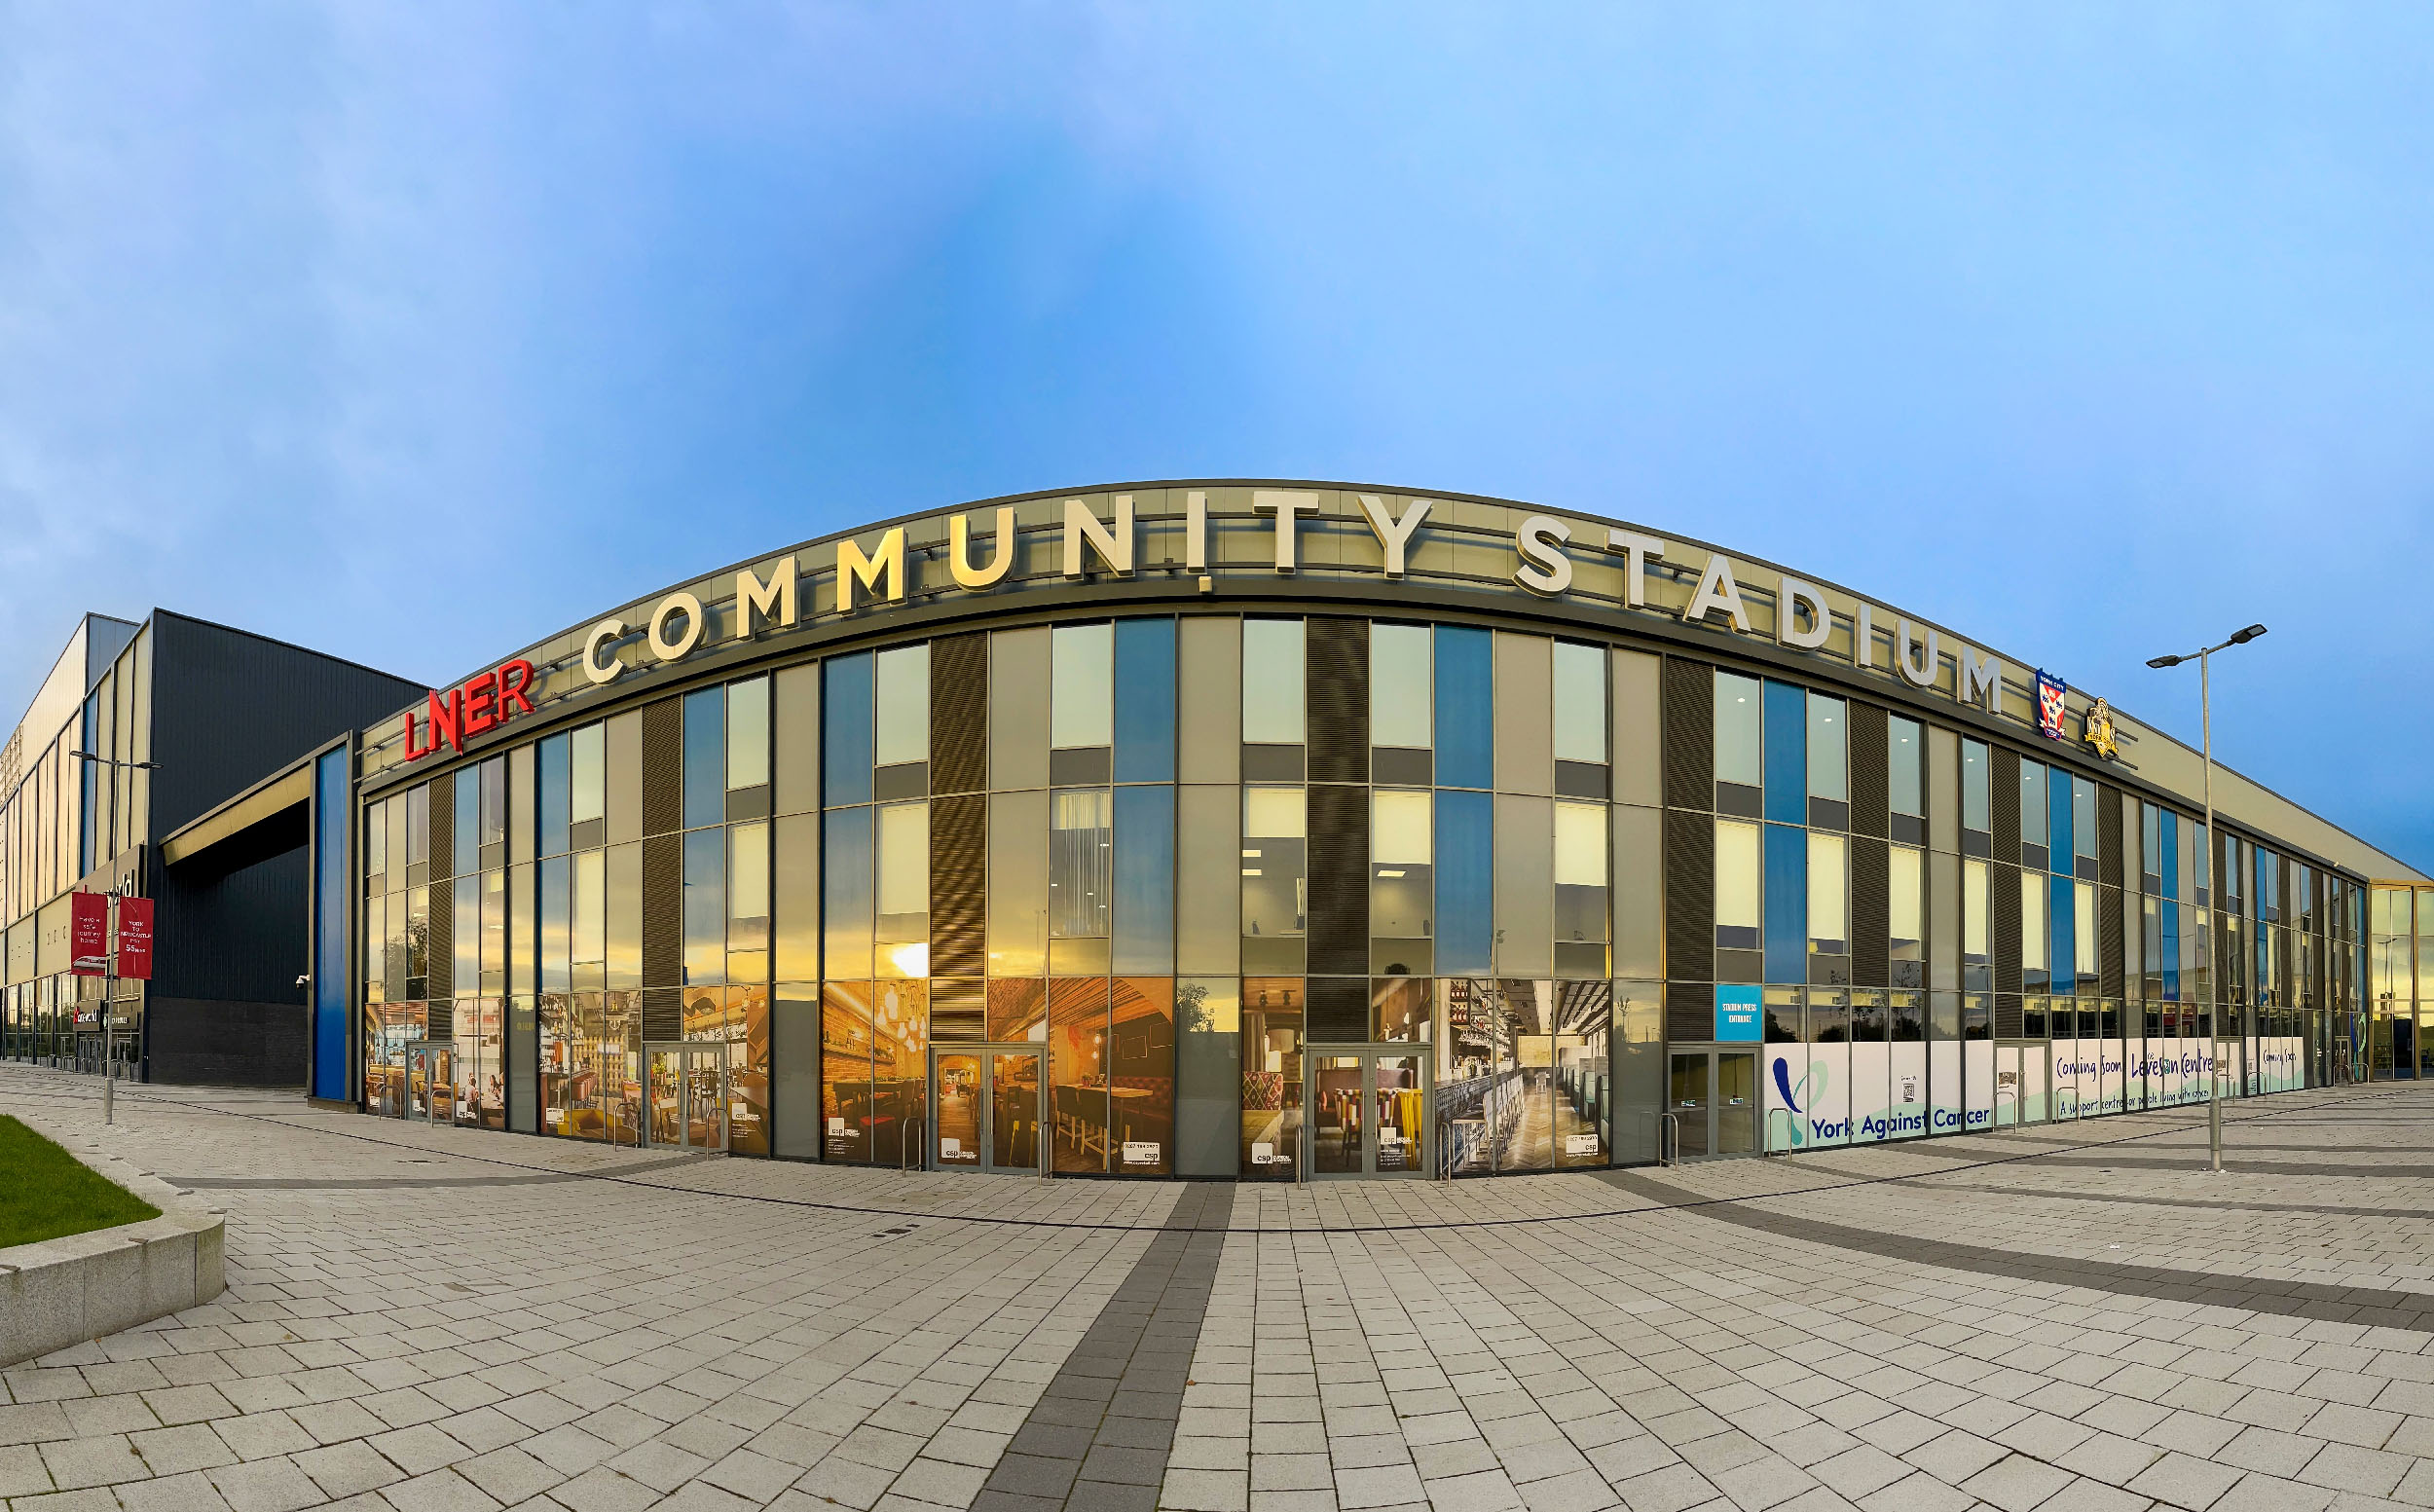
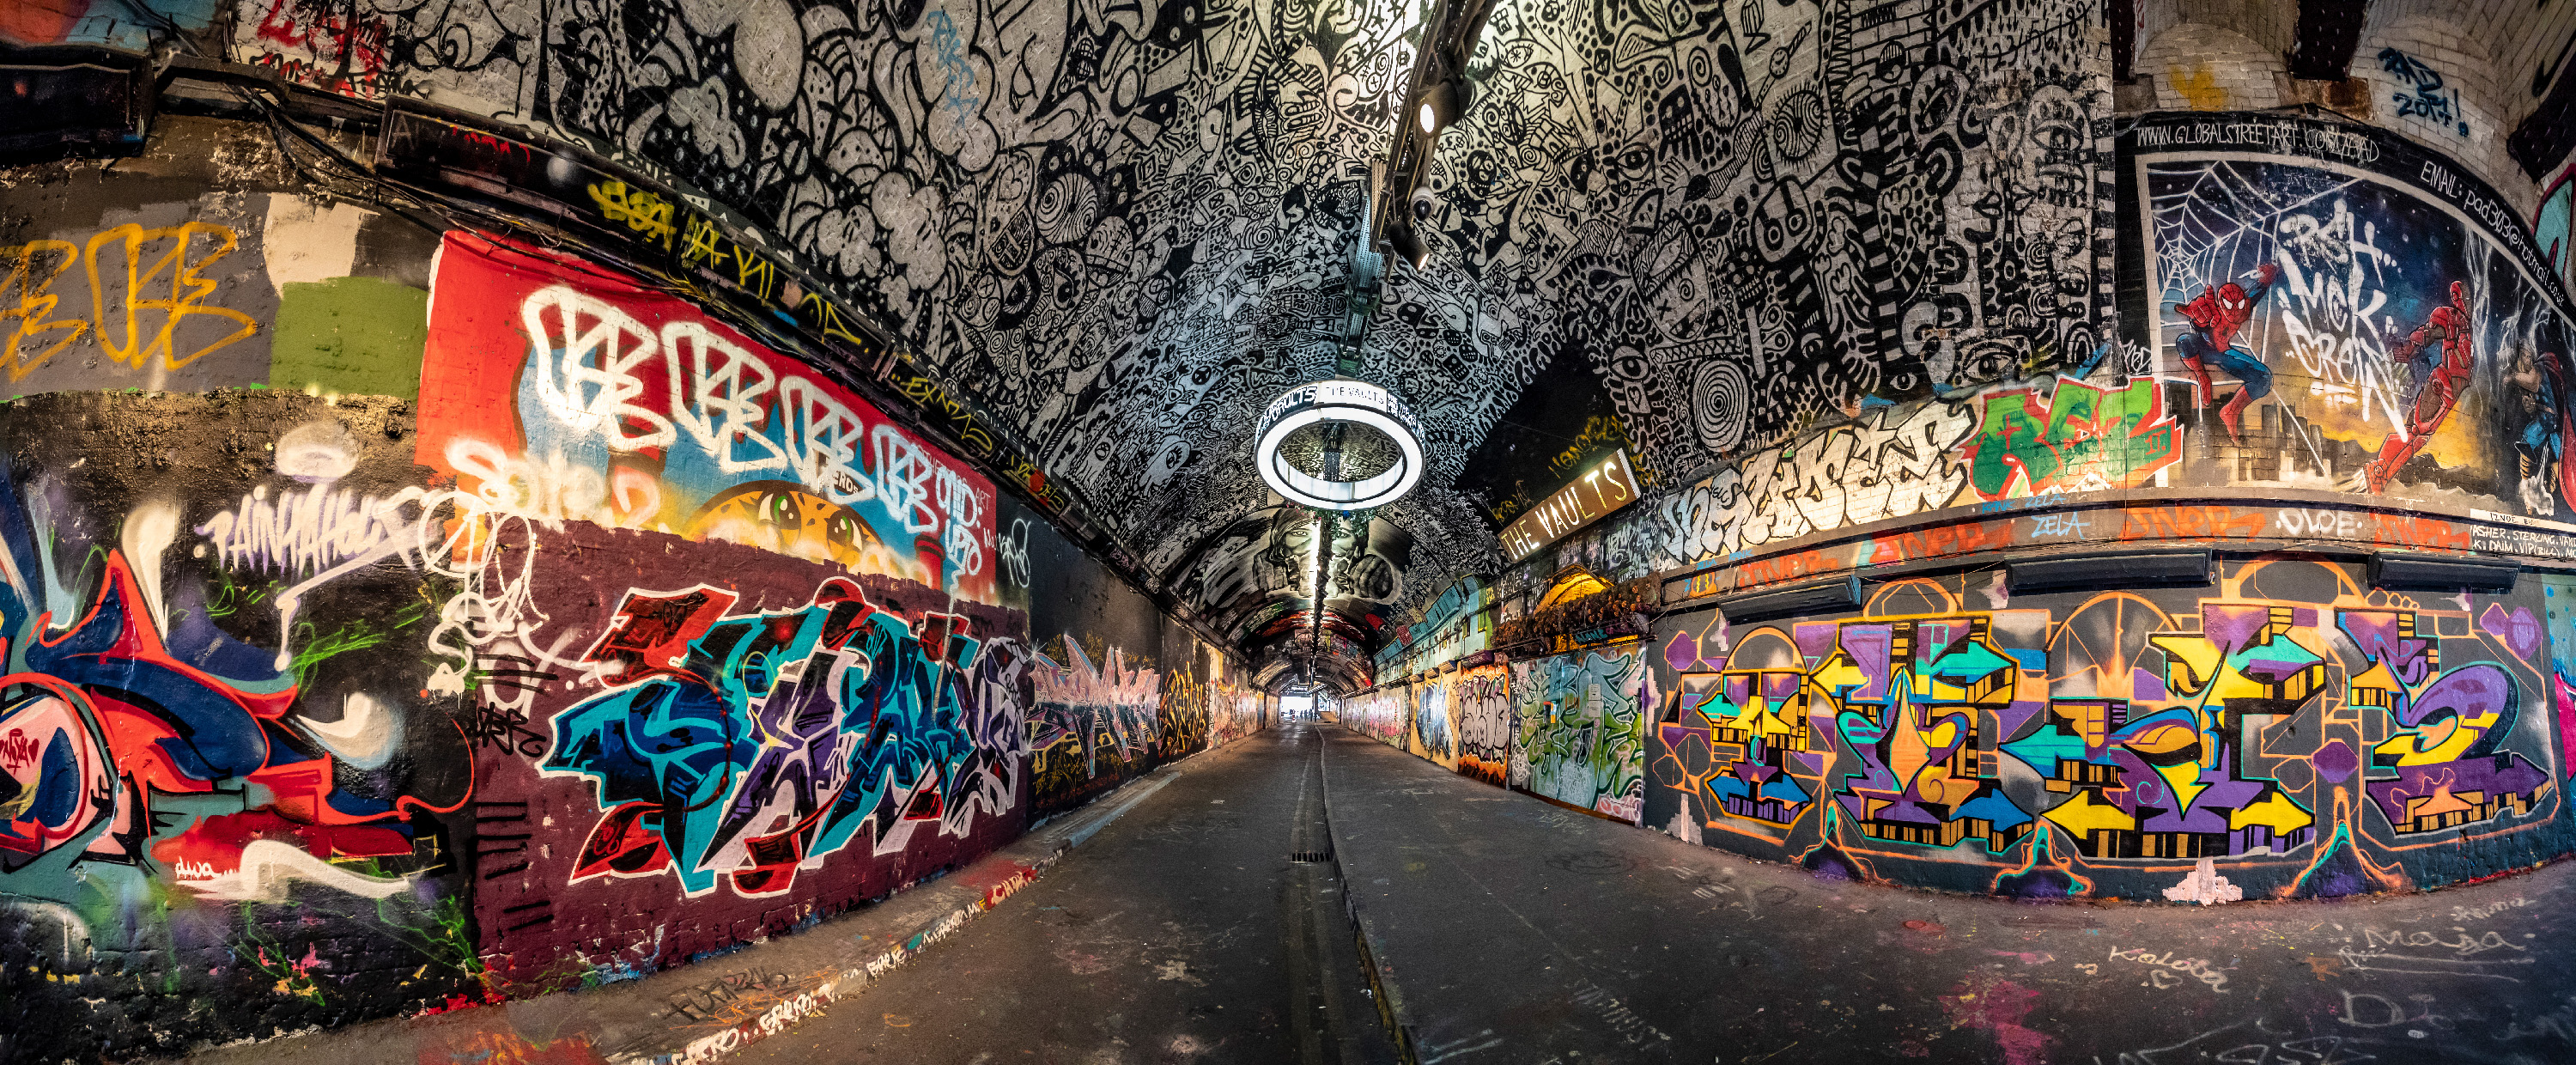
This image was taken using the iPhone's inbuilt Panoramic mode
Editing and Stitching Your Panorama
1. Importing Your Images
Transfer your images to your computer and import them into your photo editing software. Adobe Lightroom and Photoshop are popular choices, but there are also dedicated stitching programs like PTGui and free software such as Hugin.
2. Stitching the Images in Lightroom
Spherical: This method is ideal for 360-degree panoramas and wide-angle shots. It projects the images as if they were mapped inside a sphere, making it suitable for wide fields of view.
Cylindrical: Best for wide, horizontal panoramas, this method projects the images as if they were mapped on the inside of a cylinder. It helps maintain straight lines for horizons and is great for wide landscapes.
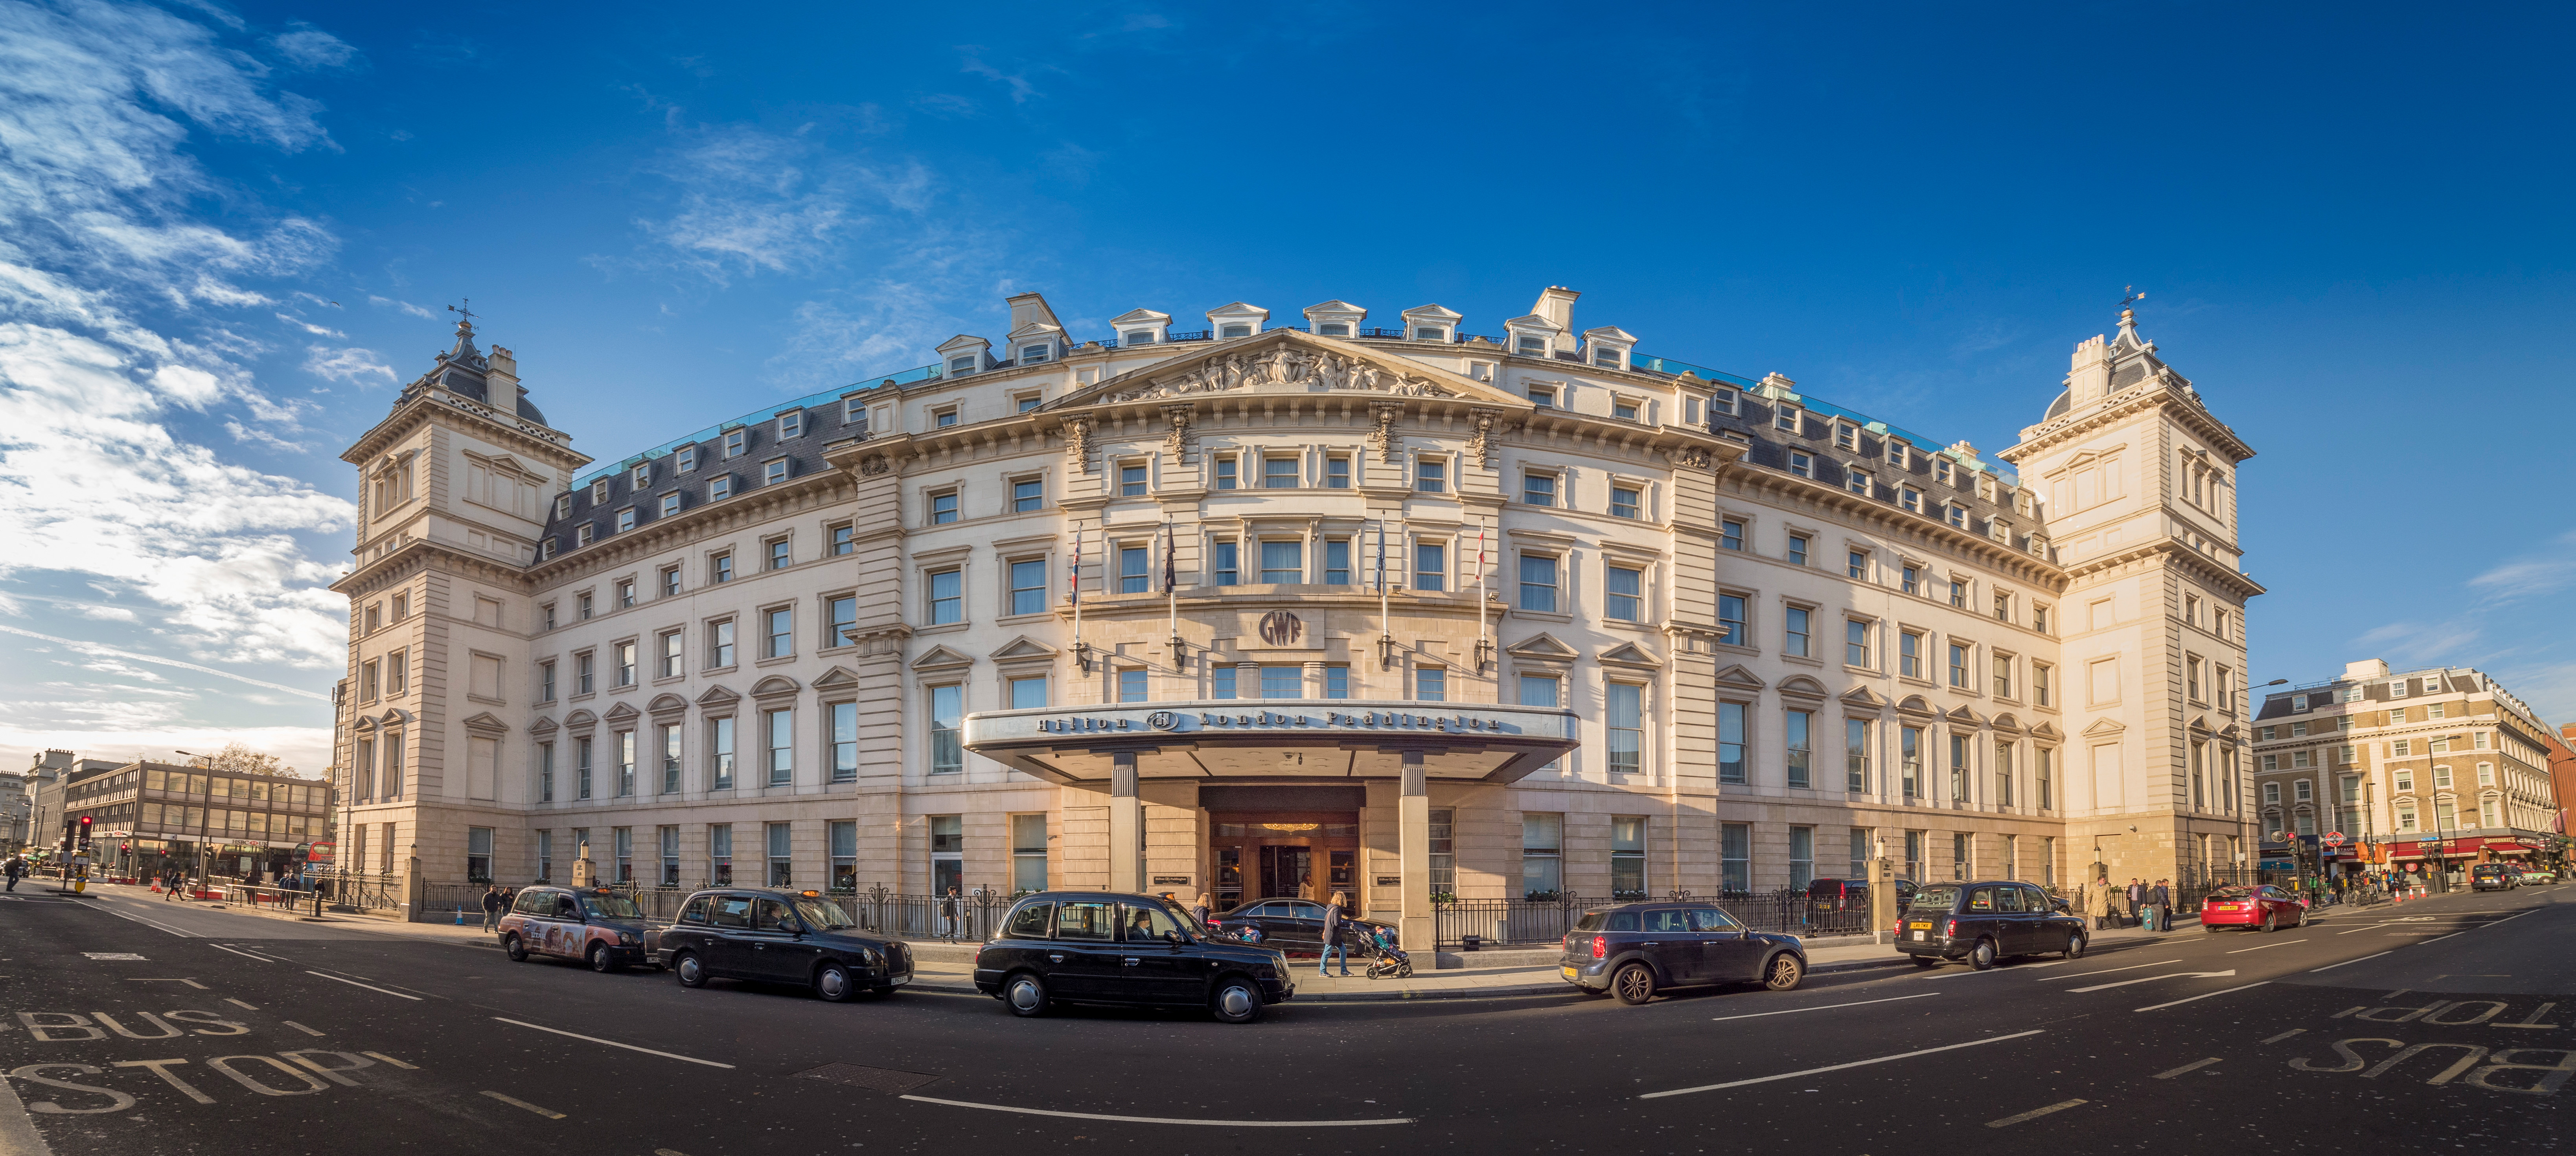
Perspective: Use this method for architectural shots where maintaining straight lines is crucial. It aligns the images as if they were on a flat plane, preserving the geometry of buildings.

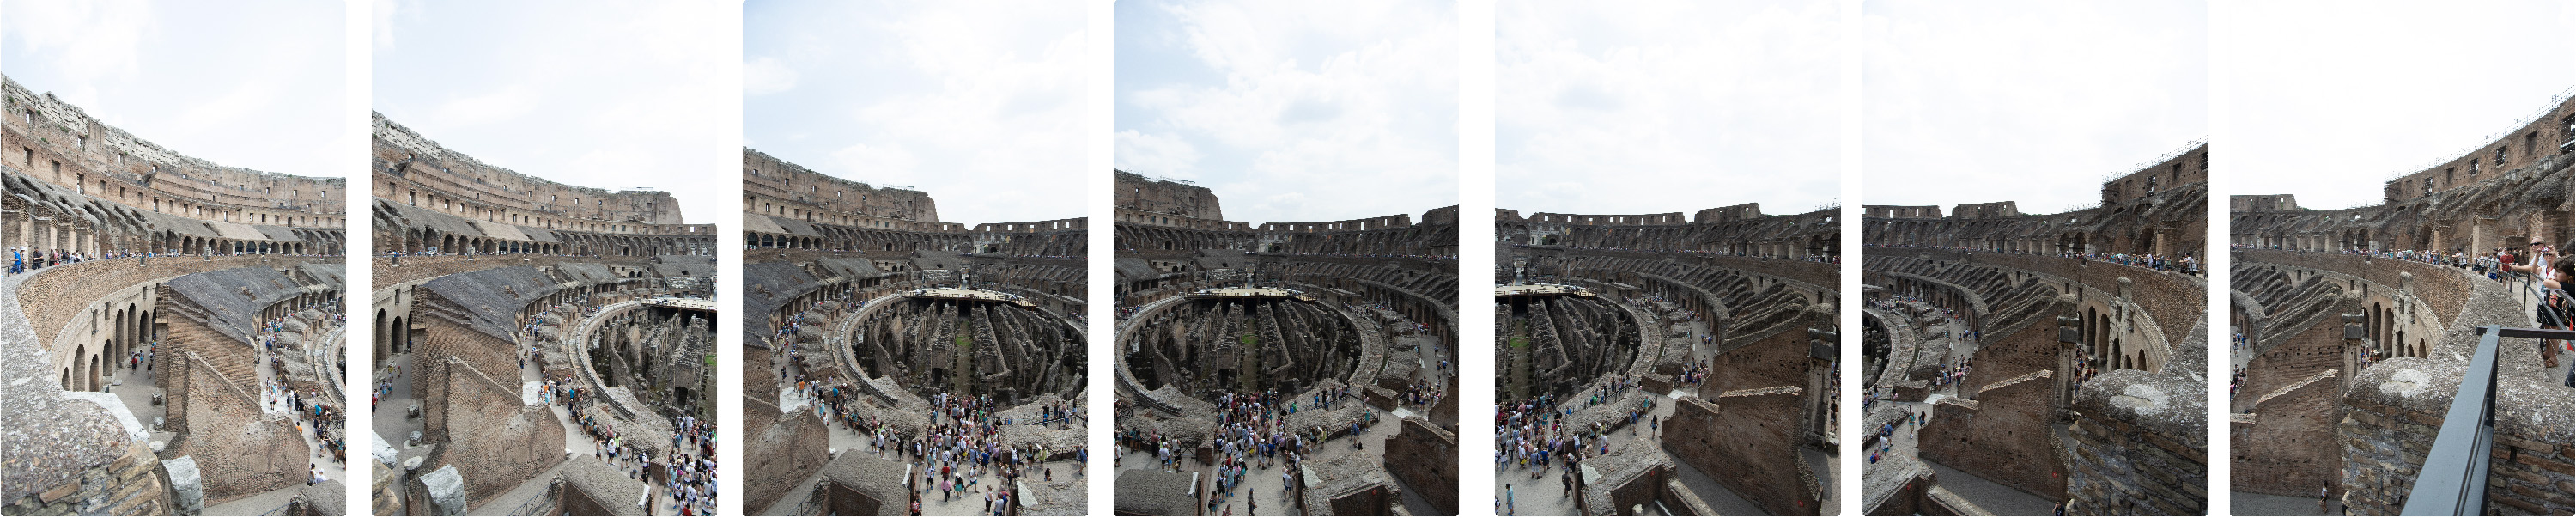
The Colosseum in Rome is an ideal subject for panoramic photography.
3. Using Curved Results Creatively
Sometimes, panoramic stitching can result in curved lines and distorted perspectives, especially when using spherical or cylindrical projections. While these may not provide a "real" view of the scene, they can be used creatively to add a surreal, artistic touch to your images or emphasise the vastness of landscapes or the grandeur of cityscapes.
4. Refining the Panorama
Crop and Straighten: After stitching, crop the image to remove any irregular edges and straighten the horizon if necessary. This step ensures a clean, professional look.
Adjust Exposure and Colours: Use the adjustment tools in your editing software to balance the exposure and enhance the colours. Pay attention to the edges where the images are stitched to ensure a seamless blend.
Sharpening and Noise Reduction: Apply sharpening to enhance details and use noise reduction to smooth out any graininess, especially in low-light conditions.
Practical Tips for Panoramic Photography
- Practice Makes Perfect: Start with simple scenes and gradually move to more complex panoramas. Experiment with different subjects and locations to develop your skills.
- Be Patient: Panoramic photography requires patience and attention to detail. Take your time to set up each shot and ensure that the images are properly aligned.
- Experiment with Different Subjects: While landscapes are popular subjects for panoramas, don't be afraid to experiment with other scenes, such as cityscapes, architecture, and interiors.
- Use High-Resolution Settings: Shoot in the highest resolution possible to ensure that the final stitched image has sufficient detail. This is particularly important if you plan to print your panorama.
- Don't limit yourself to landscape orientation: Be creative — instead of stitching images together horizontally, try the same technique vertically to create tall compositions.

Conclusion
Mastering panoramic photography can open up new creative possibilities, allowing you to capture expansive views that are impossible to achieve with a single shot. By following these tips and techniques, you can create stunning panoramic images that showcase the beauty of your surroundings. Whether you're a beginner or an experienced photographer, panoramic photography is a rewarding technique that can enhance your portfolio and expand your photographic skills.